How to Choose the Right…
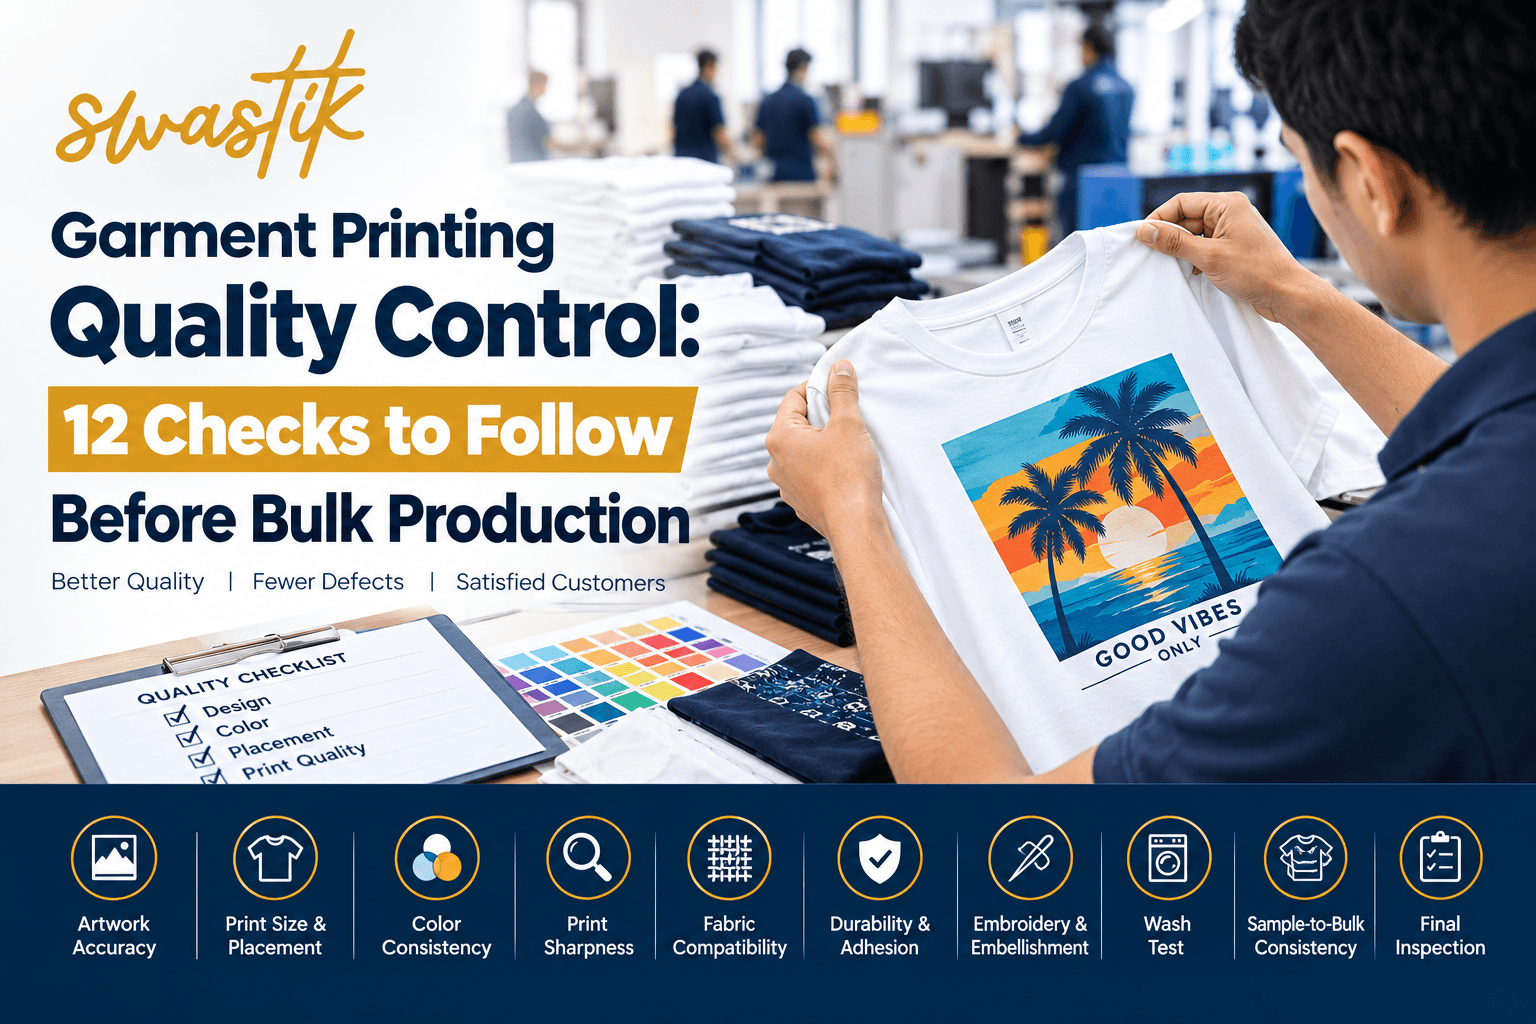
Garment Printing Quality Control: 12…
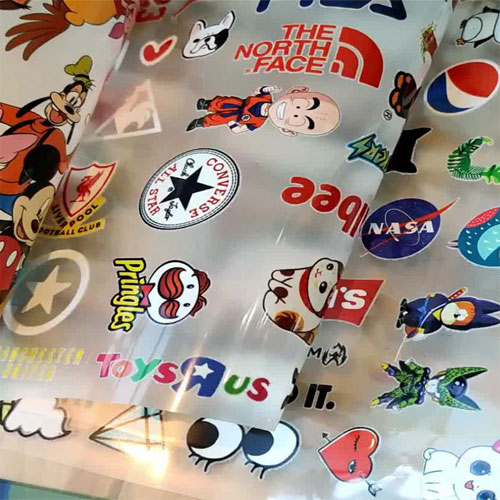
<h1 data-path-to-node="0">Premium Heat Transfer Solutions for B2B Success: High-Quality Apparel Branding in West Bengal</h1> <p data-path-to-node="1">Welcome to <b data-path-to-node="1" data-index-in-node="11">Swastik Graphix</b>, your premier destination for high-quality heat transfer solutions in Kolkata, West Bengal. As a leading manufacturer and B2B supplier, we specialize in delivering high-definition, durable, and vibrant heat transfer stickers and vinyl labels designed specifically for the garment industry. Whether you are a corporate apparel brand, a high-fashion startup, or a bulk garment exporter, our premium quality heat transfer technology ensures your brand stands out at an affordable price.</p><h2 data-path-to-node="2">Why Choose Heat Transfer for Your B2B Apparel Business?</h2> <p data-path-to-node="3">In the fast-paced world of Indian fashion and corporate branding, the demand for precision and durability is higher than ever. Heat transfer printing has emerged as the gold standard for garment customization. Unlike traditional methods, our heat transfer process ensures a seamless, "tagless" feel that enhances the wearer's comfort while maintaining sharp, photographic-quality detail.</p><h3 data-path-to-node="4">High-Quality Finishes that Last</h3> <p data-path-to-node="5">At Swastik Graphix, we understand that durability is non-negotiable for bulk buyers. Our heat transfer stickers are engineered to withstand rigorous machine washes without fading, cracking, or peeling. From <b data-path-to-node="5" data-index-in-node="207">DTF (Direct to Film) transfers</b> to <b data-path-to-node="5" data-index-in-node="241">High-Density (HD) 3D stickers</b>, we provide premium quality solutions that maintain their integrity even on stretchable fabrics.</p><h3 data-path-to-node="6">Affordable Price for Bulk Orders</h3> <p data-path-to-node="7">We specialize in serving bulk buyers across West Bengal and India. By leveraging advanced automated machinery, we provide cost-effective heat transfer printing that allows B2B clients to maximize their margins without compromising on the final look. Our pricing models are specifically structured for garment manufacturers seeking long-term supply partners.</p><h2 data-path-to-node="9">Our Range of Heat Transfer Products</h2> <p data-path-to-node="10">Swastik Graphix offers a diverse catalog of heat transfer materials tailored to various textile applications.</p><h3 data-path-to-node="11">1. DTF Heat Transfer Stickers (Direct to Film)</h3> <p data-path-to-node="12">DTF is the trending SEO favorite for a reason. It allows for vibrant, multi-color designs on almost any fabric, including cotton, polyester, denim, and nylon. Our DTF stickers are perfect for:</p><ul data-path-to-node="13"> <li> <p data-path-to-node="13,0,0"><b data-path-to-node="13,0,0" data-index-in-node="0">T-shirt Manufacturers:</b> High-speed application with zero weeding.</p> </li> <li> <p data-path-to-node="13,1,0"><b data-path-to-node="13,1,0" data-index-in-node="0">Activewear Brands:</b> Flexible prints that move with the fabric.</p> </li> <li> <p data-path-to-node="13,2,0"><b data-path-to-node="13,2,0" data-index-in-node="0">Custom Merchandise:</b> Vivid colors that pop against any garment color.</p> </li> </ul> <h3 data-path-to-node="14">2. Premium Vinyl Heat Transfer (HTV)</h3> <p data-path-to-node="15">For clean, bold logos and corporate branding, our Vinyl Heat Transfer options are unmatched. We offer:</p><ul data-path-to-node="16"> <li> <p data-path-to-node="16,0,0"><b data-path-to-node="16,0,0" data-index-in-node="0">Matte & Glossy Finishes:</b> For a sleek, professional corporate look.</p> </li> <li> <p data-path-to-node="16,1,0"><b data-path-to-node="16,1,0" data-index-in-node="0">Reflective Heat Transfer:</b> Essential for safety gear and trendy "streetwear" collections in Kolkata.</p> </li> <li> <p data-path-to-node="16,2,0"><b data-path-to-node="16,2,0" data-index-in-node="0">Metallic & Glitter Vinyl:</b> Adding a luxury touch to premium fashion labels.</p> </li> </ul> <h3 data-path-to-node="17">3. High-Density (HD) 3D Heat Transfers</h3> <p data-path-to-node="18">Take your branding to the next dimension. Our HD heat transfer stickers provide a raised, tactile effect that screams premium quality. This is a favorite for sports brands and high-end fashion boutiques looking to differentiate their products in the West Bengal market.</p><h3 data-path-to-node="19">4. Tagless Neck Labels</h3> <p data-path-to-node="20">Enhance your brand's perceived value by replacing itchy woven labels with soft, heat-applied neck transfers. These are perfect for exporters and brands focusing on consumer comfort.</p><h2 data-path-to-node="22">Targeted Solutions for Bulk Buyers and Manufacturers</h2> <p data-path-to-node="23">If you are a garment exporter in Metiabruz, a wholesaler in Burrabazar, or a fashion startup in Salt Lake, Swastik Graphix is built to scale with your needs.</p><h3 data-path-to-node="24">Streamlined B2B Workflow</h3> <p data-path-to-node="25">We understand the logistics of bulk production. Our process is designed for speed:</p><ul data-path-to-node="26"> <li> <p data-path-to-node="26,0,0"><b data-path-to-node="26,0,0" data-index-in-node="0">Custom Prototyping:</b> Get a sample to test on your specific fabric.</p> </li> <li> <p data-path-to-node="26,1,0"><b data-path-to-node="26,1,0" data-index-in-node="0">Scalable Production:</b> From 500 to 50,000+ units, we maintain consistent color accuracy.</p> </li> <li> <p data-path-to-node="26,2,0"><b data-path-to-node="26,2,0" data-index-in-node="0">Fast Turnaround:</b> Located in West Bengal, we offer rapid delivery to minimize your production downtime.</p> </li> </ul> <h3 data-path-to-node="27">Sustainable and Eco-Friendly Options</h3> <p data-path-to-node="28">The global market is shifting toward sustainability. Swastik Graphix offers eco-friendly heat transfer vinyl options that use water-based adhesives and non-toxic inks. These materials are perfect for sustainable clothing brands looking to appeal to environmentally conscious consumers.</p><h2 data-path-to-node="30">The Swastik Graphix Advantage in West Bengal</h2> <h3 data-path-to-node="31">West Bengal’s Trusted Branding Partner</h3> <p data-path-to-node="32">Operating out of the heart of West Bengal, we have a deep understanding of the local textile ecosystem. We serve the massive garment hubs of Kolkata, providing on-the-ground support that international suppliers simply cannot match. When you search for "Heat Transfer Stickers Kolkata" or "DTF Printing West Bengal," Swastik Graphix is the name associated with reliability.</p><h3 data-path-to-node="33">High-Definition Precision</h3> <p data-path-to-node="34">Our technology allows for intricate designs that screen printing often struggles with. We can reproduce fine lines, small text, and complex gradients with 100% accuracy. This precision is vital for corporate logos and detailed artistic prints.</p><h3 data-path-to-node="35">Versatility Across Industries</h3> <p data-path-to-node="36">While we are leaders in the garment sector, our heat transfers are also ideal for:</p><ul data-path-to-node="37"> <li> <p data-path-to-node="37,0,0"><b data-path-to-node="37,0,0" data-index-in-node="0">Bags and Backpacks:</b> Durable transfers for canvas and synthetic materials.</p> </li> <li> <p data-path-to-node="37,1,0"><b data-path-to-node="37,1,0" data-index-in-node="0">Caps and Hats:</b> Perfect for small-surface area branding.</p> </li> <li> <p data-path-to-node="37,2,0"><b data-path-to-node="37,2,0" data-index-in-node="0">Home Textiles:</b> Personalized cushions, curtains, and linens.</p> </li> </ul> <h2 data-path-to-node="39">How to Apply Swastik Graphix Heat Transfers</h2> <p data-path-to-node="40">Our products are designed for easy application using a standard industrial heat press. For bulk buyers, we provide detailed technical specifications regarding temperature, pressure, and peel time (Hot Peel/Cold Peel) to ensure every garment is perfect.</p><ol start="1" data-path-to-node="41"> <li> <p data-path-to-node="41,0,0"><b data-path-to-node="41,0,0" data-index-in-node="0">Preparation:</b> Ensure the garment is flat and moisture-free.</p> </li> <li> <p data-path-to-node="41,1,0"><b data-path-to-node="41,1,0" data-index-in-node="0">Positioning:</b> Place the Swastik Graphix transfer precisely on the target area.</p> </li> <li> <p data-path-to-node="41,2,0"><b data-path-to-node="41,2,0" data-index-in-node="0">Pressing:</b> Apply heat according to the provided material guidelines.</p> </li> <li> <p data-path-to-node="41,3,0"><b data-path-to-node="41,3,0" data-index-in-node="0">Finishing:</b> Peel the carrier film to reveal a vibrant, permanent brand mark.</p> </li> </ol> <h2 data-path-to-node="43">Elevate Your Brand with Premium Heat Transfer Stickers</h2> <p data-path-to-node="44">In a competitive market, your branding is your identity. Don’t settle for low-grade stickers that crack after two washes. Invest in <b data-path-to-node="44" data-index-in-node="132">Premium Quality Heat Transfer</b> from Swastik Graphix and give your customers the durability they deserve.</p><h3 data-path-to-node="45">Get a Quote for Bulk Heat Transfer Today</h3> <p data-path-to-node="46">Are you ready to scale your production with the best heat transfer stickers in West Bengal? Contact Swastik Graphix for <b data-path-to-node="46" data-index-in-node="120">affordable price</b> quotes on bulk orders. Our team of experts is ready to assist you in choosing the right material for your fabric type.</p> <p data-path-to-node="47"><b data-path-to-node="47" data-index-in-node="0">Keywords:</b> <i data-path-to-node="47" data-index-in-node="10">Heat Transfer Stickers Kolkata, DTF Printing West Bengal, Bulk Garment Labels, Premium Heat Transfer Vinyl, B2B Clothing Branding, High-Quality Textile Stickers, Affordable Heat Press Labels India.</i></p><h2 data-path-to-node="49">Frequently Asked Questions (FAQ) for Bulk Buyers</h2> <h3 data-path-to-node="50">What is the minimum order quantity (MOQ) for B2B orders?</h3> <p data-path-to-node="51">We cater to both growing startups and large-scale manufacturers. Contact us directly to discuss a custom MOQ that fits your current production cycle.</p><h3 data-path-to-node="52">Can your heat transfers be applied to waterproof fabrics?</h3> <p data-path-to-node="53">Yes, we have specialized adhesives designed for nylon and treated waterproof fabrics often used in rainwear and outdoor gear.</p><h3 data-path-to-node="54">Do you offer design assistance?</h3> <p data-path-to-node="55">Our team can help optimize your artwork for the heat transfer process to ensure maximum clarity and color vibrancy.</p><h3 data-path-to-node="56">How long does delivery take within West Bengal?</h3> <p data-path-to-node="57">For bulk orders, we typically offer a quick turnaround time of 5-7 business days, depending on the complexity and volume of the order.</p><h3 data-path-to-node="59">Contact Swastik Graphix:</h3> <p data-path-to-node="61"><b data-path-to-node="61" data-index-in-node="0">Specialty:</b> Heat Transfer, Screen Printing, Embroidery, and Swarovski Customization.</p> <p data-path-to-node="62"><b data-path-to-node="62" data-index-in-node="0">Commitment:</b> High Quality, Precision, and Customer Satisfaction.</p> <p data-path-to-node="63"><i data-path-to-node="63" data-index-in-node="0">Transform your apparel into wearable art with Swastik Graphix—where creativity meets industrial precision.</i></p>
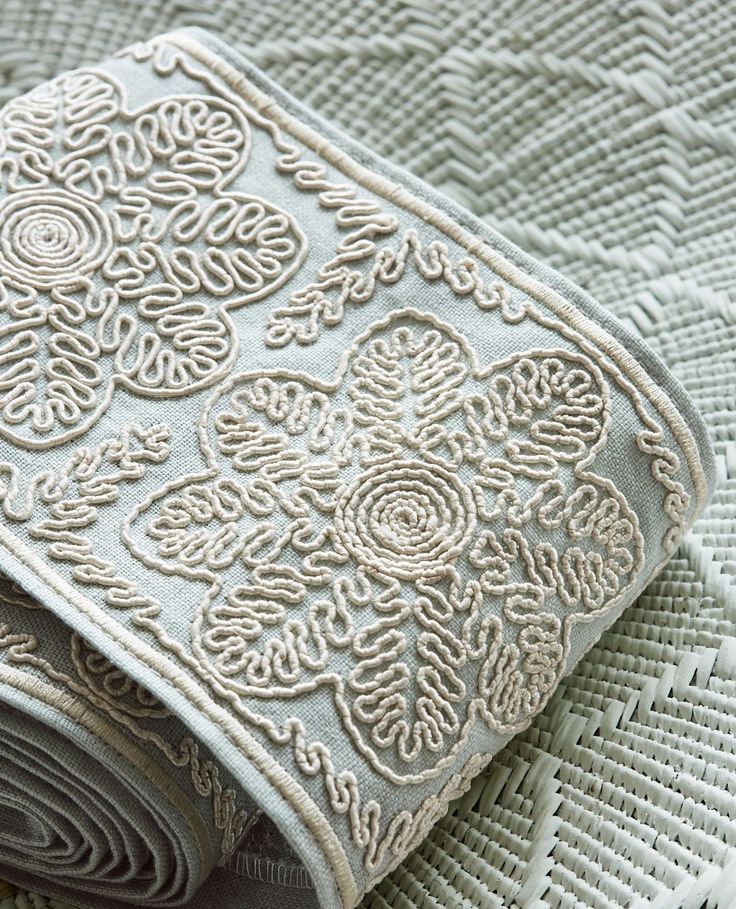
Bring texture and dimension to your designs with our premium <strong data-start="103" data-end="125">cording embroidery</strong> services. Perfect for fashion, home textiles, and accent pieces, we deliver precise, durable stitching with custom thread options. Ideal for bulk orders or bespoke runs—boost your brand with refined, tactile detailing.
How to Choose the Right Print Size & Placement for Bulk Garment Production Choosing the right print size and placement is an important part of professional garment production. A high-quality DTF transfer, heat transfer sticker, screen print, embroidery design, or other garment decoration can still look incorrect if the artwork is too large, too small,… Continue reading Print Size & Placement for Bulk Garment Production
Choosing the right print size and placement is an important part of professional garment production. A high-quality DTF transfer, heat transfer sticker, screen print, embroidery design, or other garment decoration can still look incorrect if the artwork is too large, too small, or positioned inconsistently.
For apparel brands, garment manufacturers, exporters, wholesalers, and other bulk buyers, print size and placement should be finalized before production begins. This helps maintain a consistent appearance across hundreds or thousands of garments.
In this guide, we explain how to choose the right print size and placement for bulk garment production and how to create a clear production specification for your printing partner.
The right print size and placement depend on the garment type, garment size, design shape, printing method, and intended appearance.
Before bulk production, define:
For bulk orders, the most important step is to approve a physical sample before starting full production.
Print placement is more than a design decision. It is also a production-quality requirement.
Imagine producing 500 T-shirts with the same brand logo. If the logo is positioned differently on every garment, the finished collection may look inconsistent even if every individual print is technically high quality.
Incorrect print size or placement can result in:
For apparel brands, consistency is particularly important because customers expect garments from the same collection to have the same overall appearance.
A clear print specification helps the production team reproduce the same result throughout the bulk order.
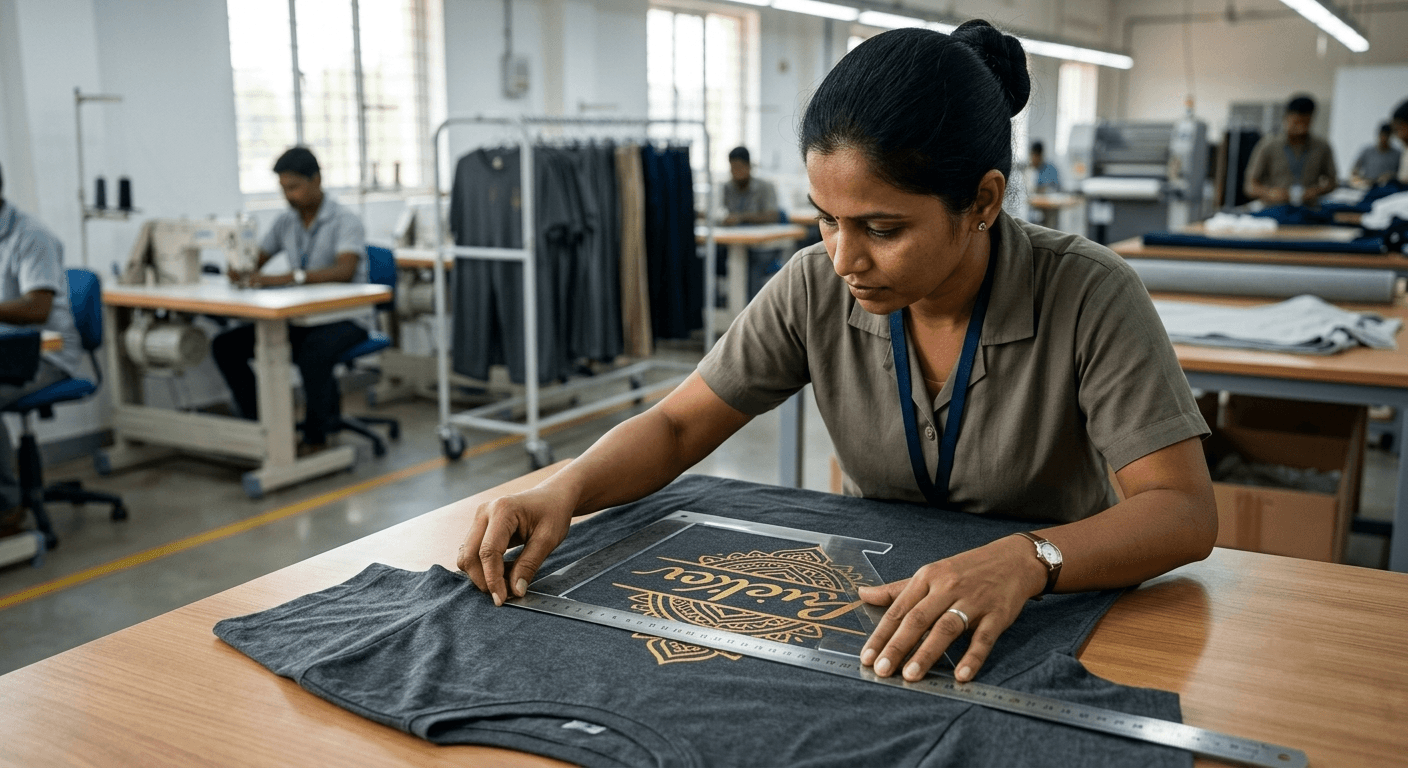
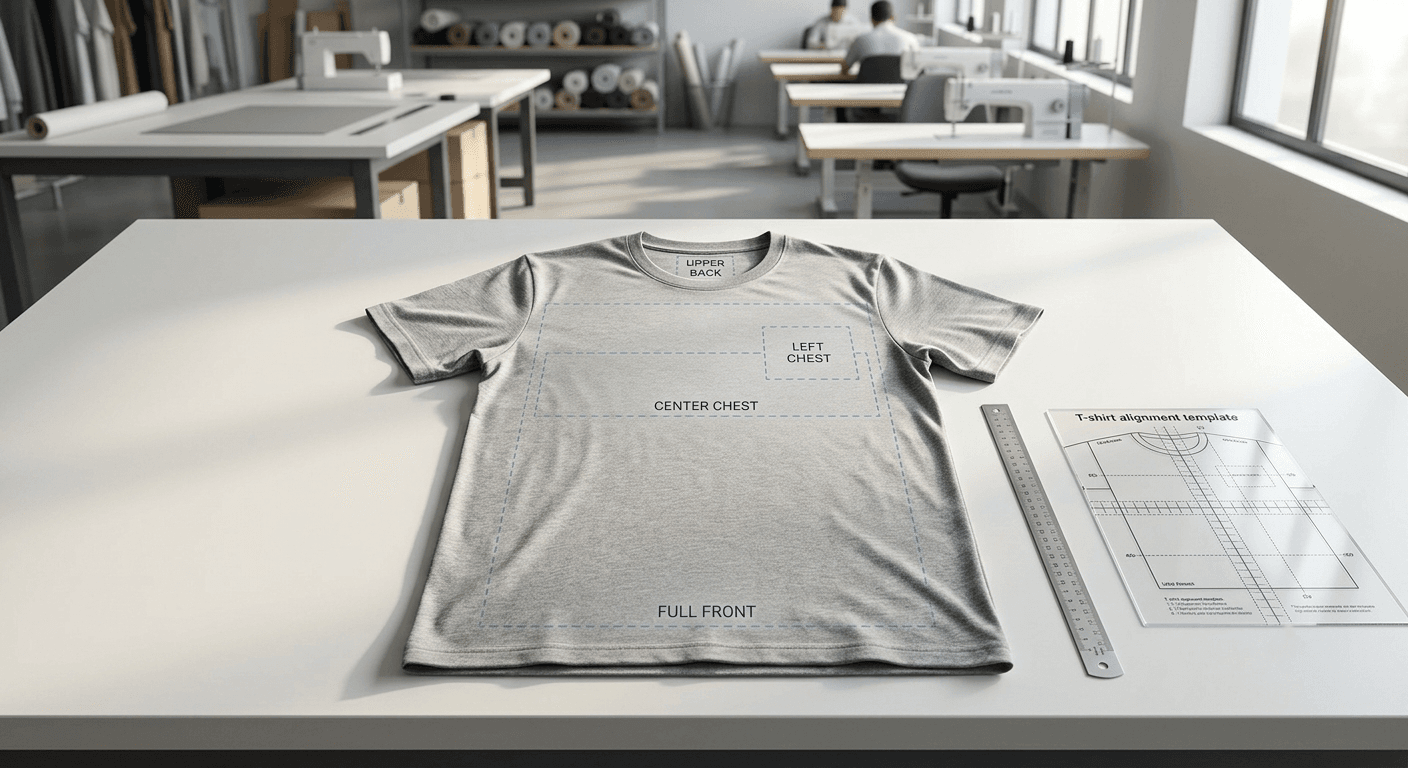
Before deciding the print size, first decide where the artwork will be placed.
Common garment printing areas include:
Each area has a different available surface and therefore requires a different approach to print sizing.
Left chest printing is commonly used for:
Because the available area is relatively small, the design should remain readable without becoming visually heavy.
For a left-chest logo, consider:
The exact measurement should be finalized according to the garment and approved sample rather than relying on a single universal measurement.
Create a physical sample and confirm the visual appearance before beginning bulk production.
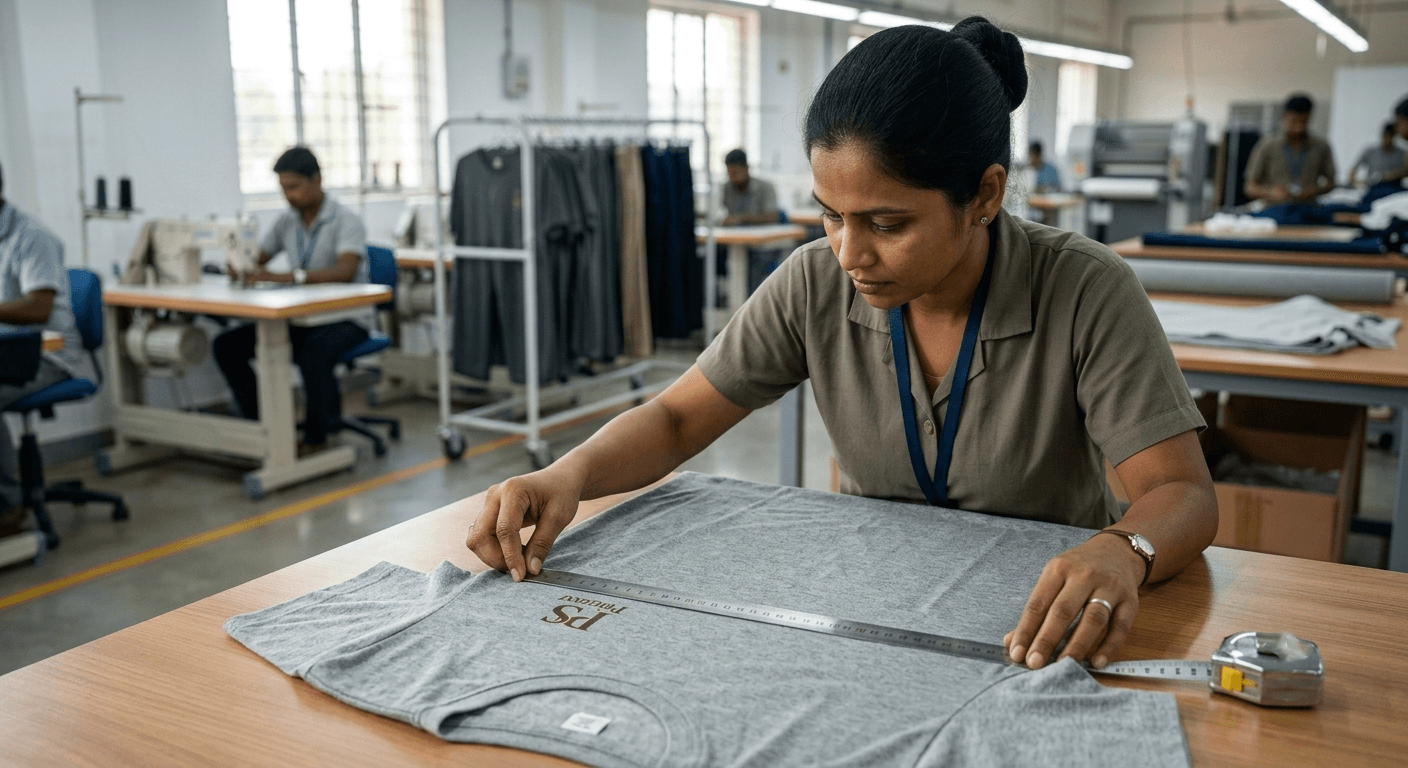
Center chest printing is widely used for:
The design should be visually centered relative to the garment construction.
However, the geometric center of the artwork is not always the visual center.
For example, a design with heavy artwork on one side may need slight adjustment to appear visually balanced.
Once approved, record the final specification for bulk production.
Large front prints are common in fashion and graphic T-shirts.
For a large front design, consider the relationship between:
Garment size + printable area + artwork dimensions + placement
A print that looks appropriate on a larger T-shirt may appear too large on a smaller garment.
Similarly, reducing a detailed design too much may make small text or fine elements difficult to read.
Before production, check the artwork at its actual production size.
Do not select print dimensions based only on the artwork file.
The available printable area of the actual garment should also be considered.
Back printing is frequently used for:
Back prints can be positioned in different areas, such as:
For consistent production, the distance from the collar or another fixed garment reference point should be clearly specified.
Instead of simply writing:
Use a more precise production specification such as:
Back → Center aligned → Approved width → Fixed distance from collar
This gives the production team a repeatable reference.
Sleeve printing requires additional attention because the printable area is narrow and the garment surface may curve.
Common sleeve applications include:
Before bulk production, check the artwork on the actual sleeve and confirm its orientation.
For sleeve designs, specify:
There is no single print size that works perfectly for every garment.
The correct size depends on several factors.
A design may need different dimensions across a size range.
For example, a graphic that looks balanced on an XL T-shirt may appear oversized on a smaller garment.
For bulk apparel production, determine whether you will use:
This keeps production simpler.
Different garment size groups may use different print dimensions.
The second approach can provide a more proportionate appearance but requires additional production planning.
Your printing partner should know the garment size range before production begins.
The shape of the artwork also affects the appropriate print dimensions.
A wide horizontal logo may need a different size from a tall vertical graphic.
For example:
Wide artwork
Best controlled by maximum width.
Tall artwork
Best controlled by maximum height.
Square artwork
Can usually be specified using width and height together.
Irregular artwork
Should be evaluated using the actual artwork proportions.
Never stretch artwork simply to fit a predefined print area unless the design has been specifically prepared for that change.
Detailed artwork requires careful consideration when selecting the final print size.
If a design contains:
Reducing the artwork too much may affect readability and visual clarity.
Before bulk production, inspect the design at its actual print size.
Print dimensions can also depend on the printing method.
Different garment decoration methods have different production characteristics.
For example, a highly detailed multicolor design may require a different production approach from a simple one-color logo.
The printing method should therefore be considered together with the artwork and garment.
For bulk production, avoid vague instructions such as:
Instead, create a production specification.
A useful specification can include:
| Specification | Example |
|---|---|
| Garment | Round-neck T-shirt |
| Garment Color | Black |
| Print Method | DTF |
| Print Area | Center chest |
| Print Width | Approved measurement |
| Print Height | According to artwork ratio |
| Alignment | Center |
| Vertical Position | Approved distance from collar |
| Garment Sizes | S–XXL |
| Sample | Approved master sample |
This gives your printing and production teams a clear reference.
For a simple logo, one print size may work across multiple garment sizes.
For a large graphic, however, using exactly the same dimensions on every garment size can change the visual proportion.
For example, a large graphic may dominate a smaller T-shirt but look relatively small on a larger garment.
There are two common production approaches:
One print size is used across all garment sizes.
Advantages:
Different print dimensions are created for different garment-size groups.
The best approach depends on the design, garment range, production volume, and brand requirements.
Once the size and placement are approved, consistency becomes the next challenge.
For bulk production, establish fixed reference points.
These may include:
The production operator can use these reference points to reproduce the approved placement.
One of the simplest ways to improve consistency is to create an approved master sample.
The master sample should show:
The production team can compare finished garments against this sample throughout the order.
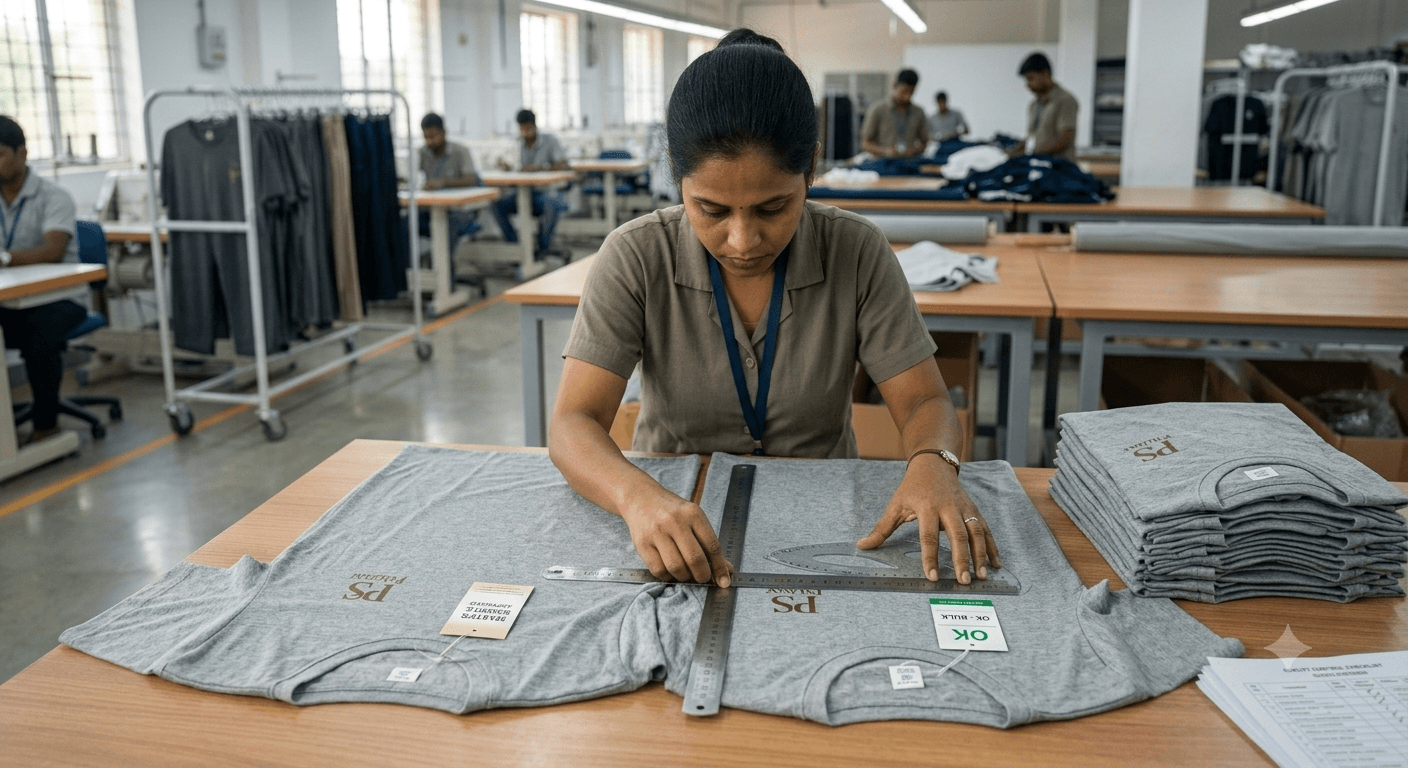
Before approving your production, confirm the following:
Artwork can look different on a monitor compared with an actual garment.
Always evaluate the design at its actual production size.
A print that looks balanced on one garment size may not look equally balanced on another.
“Center the logo” may not be enough for production.
Specify a measurable reference point wherever possible.
Starting bulk production without approving a physical sample increases the risk of discovering placement problems too late.
Once the placement has been approved, production settings should remain consistent unless a controlled change is approved.
Seams, collars, pockets, zippers, panels and garment shape can affect the available print area.
If you regularly produce garments in bulk, create a simple print specification for every design.
A useful format is:
Design Name: [Design Name]
Garment: [Garment Type]
Print Method: [DTF / Screen Print / Heat Transfer / Other]
Print Area: [Left Chest / Center Chest / Back / Sleeve]
Print Width: [Approved Measurement]
Print Height: [Approved Measurement]
Placement Reference: [Distance from Collar / Seam / Pocket]
Garment Sizes: [Size Range]
Artwork File: [Approved Version]
Sample Status: Approved
This reduces confusion between your design, merchandising, production, and printing teams.
A digital mockup is useful for planning, but it does not replace a physical sample.
A physical sample allows you to evaluate:
If an adjustment is required, it is much easier to make the change during sampling than after hundreds of garments have been printed.
A practical production workflow is:
Print placement is not limited to T-shirts.
The same principles can be applied to:
Often require logo placement on the chest, but collar and button placement must be considered.
Large front, center chest, sleeve and back prints are common. Pocket placement can affect the printable area.
Large front and back graphics require careful consideration of garment proportions.
Print flexibility, fabric stretch and placement should be considered together.
Print size should be proportionate to the smaller garment surface.
Logo visibility and repeatable placement can be particularly important.
The printable area and construction of the product should be measured before finalizing the artwork dimensions.
DTF printing is commonly used for detailed, multicolor garment artwork.
For bulk DTF production, print size and placement should be finalized before transfers are produced in quantity.
The production team should know:
This is especially important when the same artwork is being applied across a large number of garments.
A well-defined production specification helps reduce avoidable errors and improves repeatability.
Different print sizes may be useful when:
For simple logos, one size may be sufficient.
For large fashion graphics, size-adjusted artwork may provide better visual balance.
Before sending an order for bulk garment production, use this checklist:
Choosing the right print size and placement is an important part of successful bulk garment production.
The goal is not simply to make the artwork fit on the garment. The goal is to create a visually balanced, repeatable and production-ready result across the entire order.
For apparel brands and garment manufacturers, the best approach is to finalize the artwork, determine the print dimensions, establish measurable placement references, produce a physical sample and approve the final result before beginning bulk production.
Once the sample is approved, use the same specification and master sample throughout production to maintain consistency.
Whether you are using DTF printing, heat transfer stickers, screen printing, embroidery or another garment decoration method, proper planning of print size and placement can help reduce production errors and deliver a more consistent finished product.
Swastik Graphix provides B2B garment customization and printing solutions for apparel brands, garment manufacturers, exporters and bulk buyers.
Our services include DTF printing, heat transfer solutions, screen printing, embroidery, rhinestone and sequin applications, sublimation printing and custom garment printing.
If you are planning a bulk garment production order, share your artwork, garment details and required print placement with our team.
Contact Swastik Graphix to discuss your bulk garment printing requirements.
There is no single print size that works for every T-shirt. The appropriate size depends on the garment size, artwork dimensions, print location, design type and intended appearance. A physical sample should be used to approve the final dimensions.
Start by identifying the purpose of the design and available garment area. Common locations include left chest, center chest, full front, upper back, full back and sleeves. Use a fixed garment reference point to define the final position.
It can. Simple logos may use one size across several garment sizes, while large graphics may benefit from different dimensions for smaller and larger garments.
A physical sample lets you evaluate the actual print size, placement, visual balance, garment construction and final appearance before committing to the complete production quantity.
Use an approved master sample and a written production specification that defines print size, location, alignment and reference measurements. The production team should follow the same specification throughout the order.
Provide the approved artwork, garment type, fabric, garment size range, print method, print dimensions, placement location and any specific positioning requirements. A physical reference sample can also be useful.
DTF can be used for a wide range of garment graphics, including detailed and multicolor designs. The final print size should be evaluated against the garment’s printable area and the artwork’s level of detail.
Common problems include incorrect print size, inconsistent positioning, unclear production instructions, ignoring garment size differences, and starting bulk production without approving a physical sample.
Use measurable references such as distance from the collar, shoulder seam, side seam, pocket or garment centerline. Include the final print width and height in the production specification.
Check artwork, dimensions, placement, color, garment compatibility, visual balance and physical sample quality. Once approved, use the sample and production specification as the reference for bulk production.
Measure it. Sample it. Approve it. Then produce in bulk.
For consistent garment production, the right print size and placement should never be left to guesswork.
